
What is Error initializing QBPOS application log
You have opened QuickBooks Point of Sale and the “error initializing QBPOS application log” is reported on your screen. This error happens when the two files compatibility of software or windows won’t match. Check and edit the content in the shell folder of QBPOS. Also, create the new windows admin.
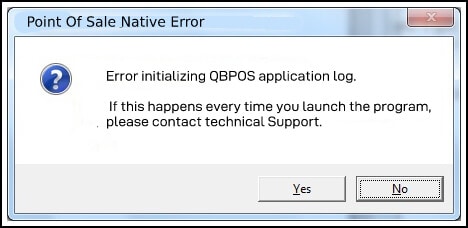
Error: Error initializing QBPOS application log
Error message: “Error initializing QBPOS application log. If this happens every time you launch the program, please contact technical support.”
QuickBooks POS provides an all-in-one point-of-sale solution for retailers, although Error Initializing QBPOS Application Log in QuickBooks may occur at times. It happens for the most part and flies up when you’re introducing or propelling the software. The major reason behind this error is the incompatibility of the two software or the damaged window files. Moreover, QuickBooks POS allows users to effortlessly enter sales data into the client’s bookkeeping software. Other QBPOS key capabilities include scanner tag filtering, charge card preparation, value inquiry, receipt notes, and more. In this article, we’ll go through the QuickBooks POS Application Log Error as well as how to fix it with ease.
The QuickBooks Point of Sale (QBPOS) Application Log is a file that records the QuickBooks Point of Sale software’s activities and events. It is used to diagnose and troubleshoot software problems. The log file contains information about the performance of the software, errors, and any other relevant data that can aid in determining the cause of a problem. QuickBooks support and technical staff use the QBPOS Application Log to diagnose and resolve software issues.
What are the significant causes of Error initializing QBPOS application log in QuickBooks POS?
Here are the reasons for the error initializing the QuickBooks POS Application Log:
- The issue is encountered when you attempt to launch QuickBooks POS.
- Corrupted windows files
- Degenerated or damaged Windows framework records
- To fix the issue of initializing the QBPOS application log in QuickBooks, you are required to consider fixing the Windows system.
Here are the steps to take to resolve the “Error Initializing QBPOS Application Log” error in QuickBooks Point of Sale:
- Check to see if the log file is present: The error may occur if the log file is missing or damaged. Navigate to the QuickBooks Point of Sale installation folder and locate the “QBPOSDBSrvUser.ini” file. If the file is missing, you must make a new one.
- Verify the file permissions: Check that the user account has the necessary permissions to access the file. Right-click on the file and select “Properties.” Navigate to the “Security” tab and ensure that the user account has the “Full Control” permission.
- Disable antivirus software: Anti-virus software can sometimes interfere with QuickBooks Point of Sale. Disabling it temporarily may help to resolve the error.
- Repair QuickBooks Point of Sale: Repairing the software may assist in resolving the issue. Navigate to the “Control Panel,” then to “Programs and Features,” then to “QuickBooks Point of Sale,” then to “Repair.”
- QuickBooks Point of Sale should be reinstalled: If the above steps do not resolve the error, the software may need to be reinstalled. Remove it from the “Control Panel” and then reinstall the most recent version.
People Also Read: POS Is Not Transferring Data to QuickBooks
How to Resolve Error Initializing QBPOS Application Log?
Below are a few Expert’s suggested methods that help you to get your error resolved easily and back to making a sale once again in QuickBooks Point of Sale (POS). Make sure you take complete precautions when you start executing every single method. Let’s proceed:
Method 1: Modify the Contents of the QBPOS Shell Folder
- End QBPOSShell task
- Press the Ctrl + Alt + Delete keys altogether from your keyboard
- Next, select the Task Manager
- Now, move to the Processes tab and highlight the QBPOS Shell
- Then select the End Task button.
- Show hidden folders
- Go to the Windows Start menu
- In the search box, type “File Explorer” and select the same icon
- Now, visit the View tab and choose the checkbox named “Hidden Items”.
- Rename the QBPOS Shell folder
- Browse to he location C:\Users\{User Logged on}\AppData\Local\Intuit
- Open the folder with the name QBPOSshell.exe_URL….. Having a latest modified date
- Do a right-click on the user.config file and select the “Rename” option
- Now, you have to rename the file to the “user.configold”
- Finally, close the window and try to open QuickBooks Desktop Point of Sale once again.
Method 2: Generate A New Admin Windows
- Create a local user account
- Go to the Windows Start menu and select the Settings option
- Select the Account >>> Family & other users (Other users)
- Now, select the option “Add someone else to this PC”
- After that, select the “I don’t have this person’s sign-in information”
- On the next page of the screen, you have to select “Add a user without a Microsoft”
- Change the local user account to admin
- Go to the Windows Start menu and select the Settings option
- Next, select Accounts >>> Family & other users (Other users)
- Choose the username you created earlier and then click “Change account type”
- Now, go to the Account Type select the Administrator, and then hit Ok
- After that, sign in as an Admin.
Method 3: Log in with A New User Account
For Windows XP users:
- First, swipe in from the right edge of your screen and press the Windows Start menu
- Next, press together the keys Windows + R to open the Run window
- Type Control Panel within the blank text field and hit Ok
- Now, double-click on the User Accounts
- Here, click on the option “Create a New Account” and follow on-screen instructions to create a new user account with admin rights
- In the end, run your QuickBooks Point of Sale and verify whether the error is resolved or not.
For Windows 7 users:
- Again, swipe in from the right edge of your screen and press the Windows Start menu
- Select the Control Panel >>> User Accounts option
- After that, click on the Manage Another Account option and select the option “Create a new Account”
- Now, add a name for the new account and choose the “Administrator” option
- After that, click on the option “Create Account”
- Once done you have to restart your system and sign in with a new admin account then attempt once again to open QB POS.
For Windows 8, 8.1 or 10, and 11 users:
- To start with look at the lower-left corner of your PC screen and right-click on the Windows Start menu
- Thereafter, select the tab called “Control Panel”
- After that, click on “User Account and Family Safety” and then select “User Accounts”
- Go to Manage Accounts and select the option “Add a New User”
- Now, hit “Add a User” and then select the link “Sign in without a Microsoft Account”
- Next, you have to select the “Local Account”
- Here, you have to simply enter a username and leave the space blank of the password field
- Once done then hit Next followed by the Finish tab
- Restart your system and try to sign in using your new account credentials
- Finally, attempt once again to open your QuickBooks Point of Sale.
Method 4: Update QuickBooks to The Latest Version
An outdated version could be one of the apparent reasons behind the error in Initializing the QBPOS Application Log. Make sure to install QuickBooks updates to get the error easily resolved. Updating software with the latest release also ensures the better security of your data.
Let’s see the process to update QuickBooks from within the Application,
- Initially, open your QuickBooks then go to the File tab and click on the Close Company/Logoff
- From the File tab, select the Exit tab
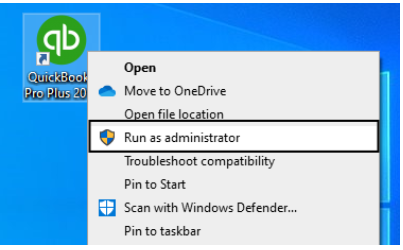
- Then right-click on the QuickBooks icon and select “Run as Administrator”
- Click Help once QB displays “No Company Open” and then select “Update QuickBooks”
- Now, go to the Options menu and click “Mark All” >>> “Save”
- Next, check mark the checkbox named “Reset Update” from under the “Update Now” tab
- Hit the “Get Updates” option and exit the application when the QuickBooks displays “Update Now” tab
- Launch your QuickBooks and hit “Yes” on the “Install Updates” popup
- After the updates are successful then relaunch your PC.
Steps to Update QuickBooks Outside your QuickBooks application
- Navigate to the QuickBooks Downloads and Updates web page and follow the link
- Choose the country >> Product >> Product version and then click the “Get the Latest Updates” link on the page
- When the updates are downloaded, move to the downloads
- Double-click on the Update file to begin the installation
- Perform the instructions that appear to install the updates
- After the updates are successfully installed, make sure that you restart your system.
Fixing unexpected errors when opening POS:
One of the following errors occurs when processing a transaction or opening POS:
- Please restart Point of Sale; an unexpected error has occurred. HRESULT Exception: 0x88980406
- A unforeseen error occurred. Value cannot be null, so that’s the error. Parameter:s
- Having trouble launching the program from the Point of Sale icon
- Error: The target of an invocation has thrown an exception.
- Initialization of the configuration system failed
- Error 100 Unable to locate database server “08w01”
- Error: 176120 key denied, invalid license key status
- QBPOSShell has encountered an error.
The errors could be caused by:
- Your computer doesn’t meet the necessary minimum specifications.
- Possible non-operation of the Point-of-Sale Database Manager due to damaged or incorrectly installed Microsoft.NET framework.
Before you begin troubleshooting, go through the following steps:
- To run QuickBooks Desktop Point of Sale, make sure your computer meets the system requirements.
- Make sure the QBPOS Database Manager vXX is running.
- Enter services.msc in the Start button search field, then click OK.
- Right-click QBPOS Database Manager vXX in the Services window and select Start.
- If Start is not available, choose Restart. (The highest number version you see should be XX).
- Start your computer again.
Solution 1: Ensure that all Point-of-Sale updates have been installed.
Note: To ensure that the issue is resolved, you may need to rename the Intuit Entitlement Client Folder before completing the update process.
- Navigate to the product updates page, select Point of Sale as your product, and then follow the instructions to install a Manual update. You may need to restart after that.
Solution 2: Try a different Windows user.
- Click the Windows Start button, then type User Accounts into the search field and press Enter.
- Choose Manage user accounts, then select another account.
- Create a new account with the name Test and click Create. Select Administrator as the user type.
- Log out of Windows, sign in as the newly created user, and try to open Point of Sale again. If the problem persists, try adjusting your UAC settings.
Solution 3: Restart QBPOSShell and check for compatibility.
- Close the Point of Sale and press Ctrl+Alt+Delete.
- If necessary, choose Start Task Manager.
- To sort the Image Name column alphabetically, select the Processes tab and then click the Image Name column title.
- Select End Process from the context menu when you right-click QBPOSShell.exe.
- Important: If you see more than one QBPOSShell, use the steps below to troubleshoot Windows compatibility.
- Close Task Manager and open Point of Sale.
Troubleshooting Compatibility:
- Right-click the Point of Sale icon on your Desktop and select Troubleshoot compatibility.
- Select Try recommendation settings and follow the on-screen instructions.
- After that, restart your computer and launch Point of Sale.
If the problem persists, try Solution 4 to repair the.NET Framework.
Solution 4: Reinstall the.NET framework and QuickBooks Point of Sale.
Reinstall process of .NET framework:
- Press the Windows button + letter R at the same moment on your keyboard to open the Run bar.
- Write commandAppwiz.cpl and hit to enter button
- Under the Programs and Features list, detect and click Microsoft. Net Framework.
- Elect Uninstall/ Change and after the uninstallation process completes, renew your computer.
- Now navigate back to the Programs and Features window and from the left side panel click Add/ Remove Windows Features.
- From the list of programs, click Microsoft. Net Framework to expand.
- Checkmark the first & alternate checkboxes and select OK.
- Follow the instructions as they appear on the screen to fully uninstall the MS frame installation.
- After removing the former installation, download and install the rearmost interpretation of Microsoft. Net Framework4.8,
- Eventually, renew Windows and open QuickBooks Integration Manager formerly again.
Reinstall process of Point of Sale:
- Uninstall QuickBooks Point of Sale.
- On your keyboard, press Windows + R to open the Run window.
- Enter “Control Panel”, then select OK.
- Select Programs and Features.
Note: If the Control Panel is in Category View, select Uninstall a Program. - In the list of programs, select QuickBooks Desktop Point of Sale 18.0, then select Uninstall/Change.
- Follow the prompts to complete the process.
- Rename all Point of Sale folders
Folder locations
- C:\Users\Public\Public Documents\Intuit\QuickBooks POS XX
- C:\Program Files (x86)\Intuit\QuickBooks POS XX
- C:\Program Files (x86)\Common Files\Intuit\Entitlement Client\v8
- C:\ProgramData\Intuit\QuickBooks Desktop Point of Sale 18.0
Delete the QBPOSDBSrvUser Windows user
- Select Windows Start and select Control Panel.
- Select User Accounts and choose Manage another account.
- In the User Account Control window, select Continue.
- Select QBPOSDBSrvUser and select Delete the account.
- Confirm the folder has been deleted.
- Restart your computer.
- Reinstall Point of Sale
- Double-click the POS download file you downloaded in the first troubleshooting step to open it
- Then click Next after selecting “Yes to All”
- Next, select I accept the license agreement’s conditions and click Next
- Click Next after entering the Product number and your License details
- Choose whether to install QB POS for a single or more users
- After clicking Install, Windows should be restarted.
- Restore your company file.
- First of all, open the QuickBooks desktop on the same computer used to make the company file backup
- Now open the original company file on the system
- Make a portable company file
- The proceeding step is to open the QuickBooks desktop on the new computer
- At last, the user requires to use the portable copy to restore the company file
Final words:
Hopefully, the above-enumerated resolutions help you in troubleshooting the Error Initializing QBPOS Application log. If you still face any difficulty, you can get further assistance through the QuickBooks experts team for smooth implementation.
When using QuickBooks Point of Sale, a frequent problem that can happen is the “Error Initializing QBPOS Application Log”. A damaged or missing log file, insufficient permissions, interference from an antivirus program, a corrupted software installation, or an out-of-date software version are just a few possible causes of the error. You can try checking the log file, confirming file permissions, turning off antivirus software, repairing the software, or reinstalling the software to get rid of the error. It is advised to contact QuickBooks support if the error continues.
Infographic to Fix Error initializing QBPOS application log in QuickBooks
FAQ
How to edit the QBPOS Shell Folder in Windows 7 to fix the error of initializing the QBPOS application log into QuickBooks?
The steps guide for Windows 7 users on how they can perform the editing in the QBPOS Shell Folder to resolve the error encountered.
The steps are mentioned here:-
1. Open the Control Panel
2. You have to click on the View tab in the Folder Options
3. Go to the Advanced Settings
4. Select show hidden files, folders, and drives
5. Click on Apply to apply changes and then click the OK button to close the window
6. Go to the location C:\Users\(Name of the user)\Appdata\Local\Intuit\QBPOSshell.exe
7. You have to right-click on the user.config and then click on Rename option
8. Now, do rename the file by adding OLD at the end of the file name
9. Then press Enter button to save the rename folder name
10. Close all the things and try to open the QuickBooks POS and check for errors.Can I uninstall and reinstall the QuickBooks software to fix the error initializing the QBPOS application log into QuickBooks?
Yes, you can uninstall and reinstall the software with the proper process so that it won’t cause any other problem to you. Firstly, uninstall the software using the Control Panel followed by uninstalling the wizard. After that, you have to reinstall the software by using the older downloaded installation file or download the new installation file. Then install it with the step-by-step instructions of the installation wizard. Then use the software to check for errors.
If I restore the Backup then it helps in resolving the error initializing QBPOS application log into QuickBooks?
Yes, you can try to restore the backup and again do the task carefully that causes you this error initializing QBPOS application log into QuickBooks. The restored data helps you in restoring all the data that you even lost while having this error.
To restore the steps are:-
1. In QuickBooks, click on the File menu option
2. Select the Open or Restore option from drop-down menu
3. Click on Restore a backup copy and press the Next button
4. Click Local Backup to restore data file from the local backup file then click the Next button
5. Browse for the backup file to restore then select it
6. Select the folder to decide where you want to restore the company data file and click the Open button
7. When all is set, then click the Save button, and you are done.Why is my Windows user unable to run qBPOS services?
Your Windows User must grant permission for QBPOS Services to run. QuickBooks POS Services cannot be run because of Windows User Account Controls. You may have a faulty Windows user. There is damage in the Point-of-Sale installation, which causes QuickBooks Windows administrator issues.
How do I restart the qBPOS database manager?
Restart the Point of Sale To launch the Run command, press Windows+R on your keyboard. Enter “services.msc” in the Run window. Right-click the QBPOS Database Manager (version), then select Restart.
Speak to A Specialist about QuickBooks Software
Headache🥺. Huh, Save time & money with QuickBooks Support 24×7 @ +1-800-892-1352, we provide assistance to those who face problems while using QuickBooks (Support all U.S. & Canada Editions)
--- Support - We provide solutions for the following QuickBooks (Pro, Premier, Accountant, Enterprise, Payroll, Cloud) ---
- Error Support
- Data Import
- Data Conversion
- Payment Solutions
- Upgradation
- Payroll Support
- Data Export
- Software Integration
- QuickBooks Printer Support
- Complete QuickBooks Solutions
- Tax-Related Issues
- Data Damage Recovery
- Installation, Activation Help
- QuickBooks Windows Support
 1-800-892-1352
 Chat Now
 Schedule a Meeting